
Can’t decide whether to get your sweetie roses or candy for St. Valentine’s Day? Choose both with our simple and stunning marzipan roses. It’s a 3 minute, 3 ingredient recipe (plus food coloring) that tastes absolutely delicious. Sculpting the roses is a skill-less task, but they look like you put a lot of effort into making them. If you can work with play dough, you can make these roses.
I love food sculpture, but I hate it when the pretty food doesn’t taste good. What’s the point of that? This is the marzipan recipe I use when making cakes, because nobody enjoys the flavor of fondant or gum paste. Marzipan is a sweet almond candy, which means it is not only delicious, but it also has the health benefits of almonds. My kids love this and I feel so much better giving them homemade marzipan candies as opposed to the factory-made chemical creations that line the drugstore aisles.
- 8 oz. can of almond paste (found in the baking aisle)
- 2 c powdered sugar
- ¼ c corn syrup
- Scoop the almond paste out of the can and into a food processor. Add the powdered sugar. Pulse several times to incorporate it evenly. It will look powdery.
- Add the corn syrup and pulse several times again in order to incorporate it fully.
- When it is well mixed, you can pick up a handful and easily press it into a shape.
See the Marzipan Come Together
Add the powdered sugar and almond paste in a food processor.

After a few pulses, the marzipan comes together and can be colored and shaped into anything you desire!

How to Make Marzipan Roses
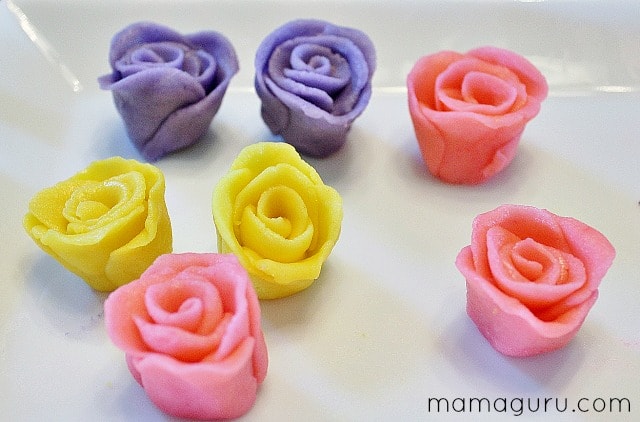
Divide the marzipan into however many colors you want to make; I divided mine into thirds. Take a small amount of food coloring gel and place it along with the marzipan into the food processor. Pulse to distribute. This will not give you an even texture, but starting in the processor makes the job a lot easier. Once the color is distributed evenly, take out the marzipan and knead it with your hands to work the color all the way through.

To make your life easier when coloring in the food processor, choose to work from light to dark colors. I first colored the yellow, then pink, and finally purple. That way I didn’t need to wash in between colors.

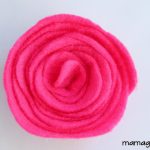
1. Take a small amount of marzipan. Roll it into a ball and flatten it with your palms and then your fingers, making a nice delicate edge. Dip your fingers in water and run wet fingers along the edge if you need help keeping it smooth or to free it from sticking. Make about 5-6 petals per rose.

2. Take one petal and roll it between your fingers to create the center bud.

3. Add petals around the bud, overlapping at times. Remember nature isn’t perfect and these don’t need to be either. Don’t worry about the chunky back. Focus on making a nice flower first.


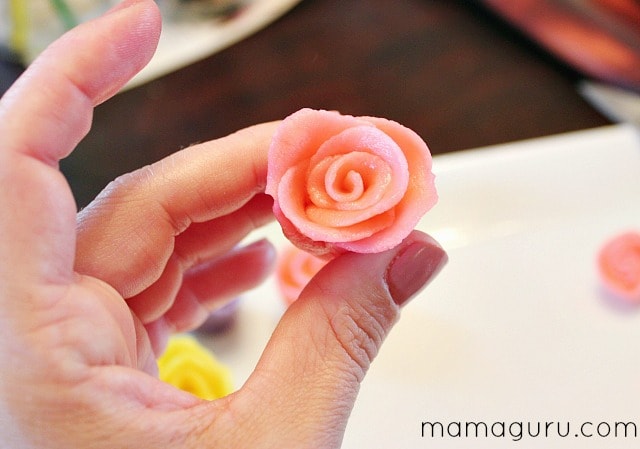
4. Once you are happy with the front, gently slice off the excess on the back.

Roll it enough to smooth it out, but keep the back flat so it can sit up straight in the box.
These roses will keep for days, although in my home they lasted for only minutes because we find them irresistible. You can cover in plastic wrap or let the air make a slight crust. You don’t need to worry at all; it is very low maintenance.
Enjoy!
xoxo


Oh my goodness, what a lovely memory!
Oh they are so cute! I have lovely memories of making marzipan fruit with my Nanna every Christmas when I was little, I haven’t had it in years though. I might have to try making some with my son this year 🙂
Wow, I never knew Marzipan was so easy to make! And the flowers are gorgeous – what a great recipe! Thanks for linking this up with us at Hump-Day Hype! I’m pinning this for Valentine’s Day 🙂
Wow, these look fantastic! I hate the taste of fondant and this is so much better! It actually looks like I might be able to do it too!
These are so pretty! What a gorgeous treat for Valentine’s Day.
Lucy, I have to challenge you on this. It is as easy as the tutorial makes it look. It’s not a piping bag. Marzipan has the texture of play dough, so you really can sculpt it.
Yes! I always decorate my cakes with marzipan. Sometimes I make a bunch of roses and then I make very small balls, like polka dots.
Sonia, I adore marzipan too! I actually use it all year to decorate cakes, because it tastes so good and is so easy to work with.
It is seriously like playing with play dough, Berrak. You can do it!
These look SO good! I can’t want to try them. Thanks for sharing!
You make it seem so easy!
These are so cute! I don’t do any fondant or gum paste work because, you’re right, nobody likes the taste! I’ll definitely try these on my next cake.
I love marzipan and missed it over the holidays. How nice to have a recipe for spring. Thank you!
These roses are so pretty! Thanks for the step by step instructions, as well as the recipe. I’ve always found the prospect of making roses to be daunting, but this post has encouraged me to give it a try. I was wondering if your could use these roses to decorate the top of a cake?
Those are so nice! Now I want to try making them. Thanks for the tutorial!
These are gorgeous! Thanks for making this so detailed and beginner friendly! I’ve been thinking about a theme for our daughters first birthday and I keep coming back to “flower power” so I think I’ll be trying these out for that!
So cute and festive! I wish I had more baking skills!
These are so cute. I would love to try making these with my daughter.
wow !! i am definitely trying this out for valentines day !! i love the idea and you are so creative !!
These are so pretty, and they look so fun to make! I love how you put them in the heart box like chocolates, that’s adorable!
mmmhh these look delicious and amazing! I could totally see myself making these to decorate a birthday cake with!
These came out beautiful! Thanks for sharing how to make!
You make this look so easy! Mine wouldn’t look this amazing!