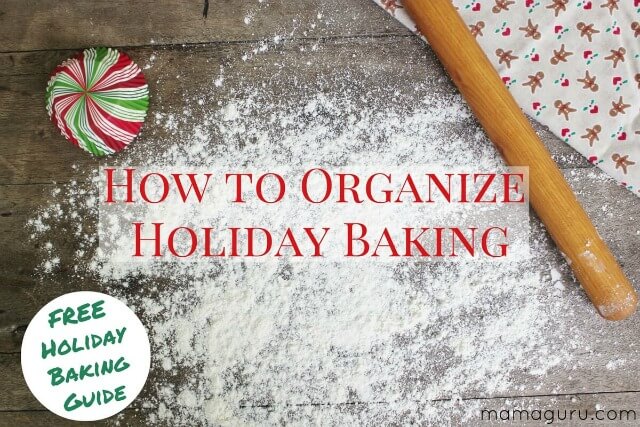
Everybody loves holiday baking, but it can be a chore to organize. If you’re not careful, you’ll find your entire kitchen dusted with flour while you cry over sprinkles at 1 o’clock in the morning. Christmas cookies are the best cookies of the year, but they do require a bit of extra work, especially if you are giving them out as gifts. Here is a list of my top ten tips to organize your holiday baking. By following these simple suggestions, your entire baking process will be much easier and more fun! In fact, your kitchen will run as smoothly as Mrs. Claus’!
There’s a lot of information here, so I’ve made a FREE Holiday Baking Guide for you to download and print. Keep it close by when you get ready to bake!

Top 10 Holiday Baking Tips
1. The first step is always: THINK AHEAD.
Are you planning on giving cookies as a gift, serving them at a party or keeping a plate on hand for your own little elves? If the baking is just for yourself, you can do it whenever you want. If it’s for a specific occasion, it is best to start three days back from your serve date. Almost every recipe says that cookies sealed in an airtight container will keep for a week or two, but they really lose their freshness and flavor. Also, your friends probably won’t eat them all in one sitting, so make sure you don’t give them cookies that will expire immediately.
I like to give cookies as gifts, so I wait until very close to Christmas. I also like to have them on hand, so I’ll choose one or two recipes just for us and bake them throughout the season. Mini gingerbread boys are great for this, because they’re easy to make and when they get a little dry, they make wonderful dunkers.
2. Make cookies in 3 steps: mixing, baking and decorating.
The first step is dough making. Most cookies need to chill, so this is the perfect do-ahead step. Freeze the dough if it will be more than a week before you bake it. Otherwise, wrap it tightly in plastic wrap and keep in ready in the fridge.
If you are doing a lot of baking, it’s easiest and most energy efficient to bake all the cookies on one day and decorate them on the next. That gives the cookies time to cool before frosting and prevents baker burn out. Cute cookies take time and effort to decorate, so start fresh the day before you plan to serve/give them.

3. Bring all ingredients to room temperature before baking.
Dough mixes better when all of the ingredients are at room temperature. Leave butter and eggs on the counter in the morning if you plan on cooking them that night, or leave them out overnight if you bake early. Eggs are hermetically sealed and safe to leave on the counter for a week.

4. Plan tasks for little helpers.
Take into account your kids’ ages and interests when choosing how they will help. Are they looking forward to frosting and adding sprinkles? Is mixing fun? Do they like to cut out the shapes? If you need to make a lot for gifts, you may want to limit their involvement so you don’t get frustrated. You can plan a batch or two just for your family and let the kids take over.
Young children benefit from getting everything set up before they are invited to help. Prep bowls of ingredients like you were on a cooking show, so you don’t have to scurry around. They will be excited and don’t like to wait, so this keeps things positive. For frosting, get all the bowls, spreaders and sprinkles ready before you call them in to help. Stop the clock during this time. Grab the camera and cherish the moment. It’ll be yummier than the cookies.
5. Cut down on clean-up.
When making your doughs, use one mixer and make them from lightest to darkest. You don’t need to wash the bowl and beaters in between each dough. (Of course, if you are baking for someone with an allergy, everything must be scrupulously clean to avoid cross-contamination.)
Use liquid measuring cups and a liquid measuring shot glass for your wet ingredients. Use your dry measuring cups and spoons for your dry ingredients. You won’t have to wash any of them in between dough if you use them properly.
Again, if you divide your days into mixing, baking and decorating, you will only clean up after each task once!
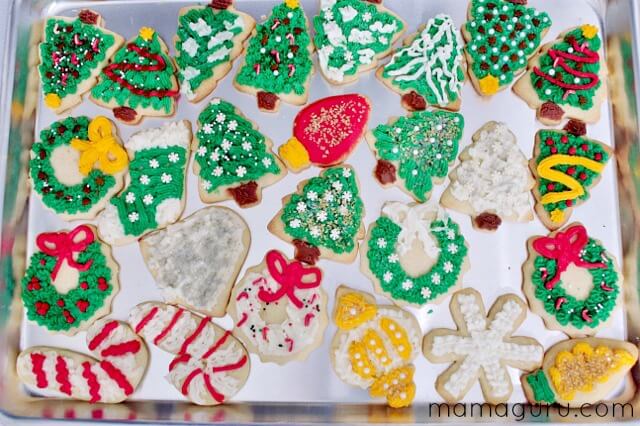
6. Exercise cookie -cutter smarts.
Not all cookie cutters are created equal! Many of the cutest cutters turn into boring blobs once baked. The best choices have very straight-forward shapes and no special details. Think about what is fun to decorate. You don’t have to make every shape in your set. I always make at least one batch of just Christmas trees, because they are my favorite.
BEST SHAPES: Christmas trees, stockings, wreathes, snowmen, ornaments and mittens
WORST SHAPES: Santa, sleighs, wreathes with candles, elves, intricate snowflakes
BEST EXTRAS: A few stars and bells are great for decorating burn-out. They can use whatever frosting color is left. Also, I like something not as cute to nibble on first, so I can eat while I admire my work.
LAST SHAPE TIP: Reindeer are really cute when made out of gingerbread. Add a red dot for Rudolf.

7. Know your icing.
Buttercream tastes best, but never completely hardens. I use it on sugar cookies. Royal icing hardens to a perfect glaze which makes it best for a cookie that will be stacked in a tin, but it’s not as delicious. Add a bit of lemon juice to improve the taste. I use royal icing for gingerbread people.
If any icing gets too runny, add more powdered sugar.

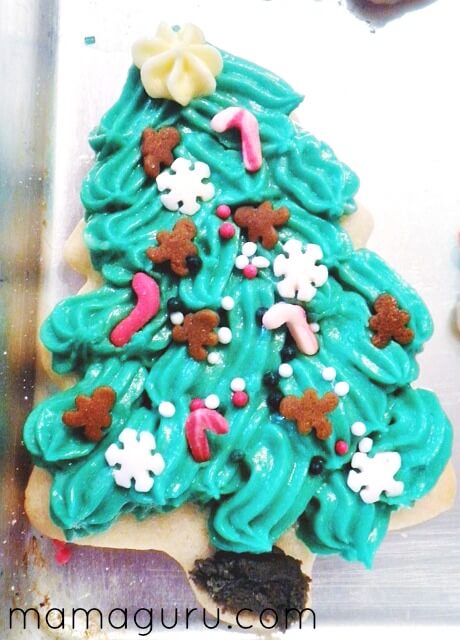
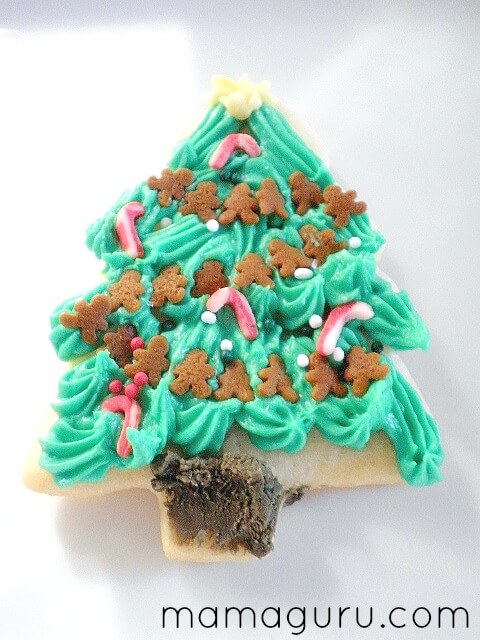
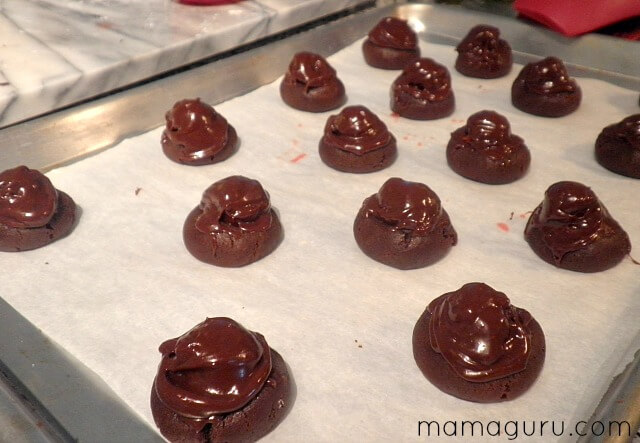
8. Decorate cookies factory-style.
Triple the amount of frosting your recipe suggests. Leftover frosting can be sandwiched between graham crackers and frozen for a treat. However, you probably won’t have any leftovers.
Color your frosting with gel colorings (widely available at craft stores), rather than the liquid food dyes found at the grocery store. You’ll get true colors that way. It’s the only way to get a real red or black. Add cocoa powder for brown; it’s yummy and the right color.
Use piping bags. Apply all the green, then all the white and so on. Trees get the green first, because if you run out, it is better to have a pink mitten than a pink Christmas tree. Your technique will improve as you go along. Stars and bells are last.
Use tweezers to apply sprinkles in just the right place. Do it while the frosting is wet or it will never stick.

9. Buy this pan!
Baking sheets with lids are an amazing tool that let you store your frosted cookies flat. This keeps them cute, because tins and tupperware always smash them. It’s important to have completed all your baking the previous day, so you don’t tie up your baking sheet with storage. If you don’t have a lidded pan, you can store cookies on cooled cookie sheets wrapped tightly with plastic wrap and stacked perpendicularly (so they don’t smash each other.)

10. Take pictures.
Cookies are deeply appreciated, but quickly gobbled. Capture the cuteness, and then insist they be eaten. I hate it when people say they’re too cute to eat. If it was meant to last, I would’ve used clay.
Holiday Baking Guide Cheat Sheet
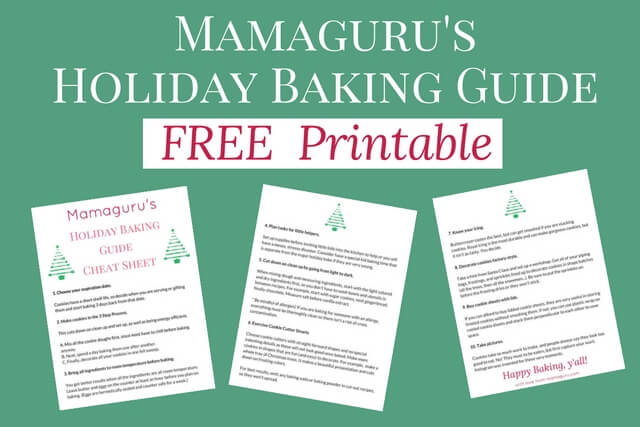
There’s a lot of information in this post, so I’ve created a handy Holiday Baking Guide Cheat Sheet for you containing all 10 Tips to help your holiday baking run smoothly. My motto is: Make it easy! Keep it Fun! Download your printable and post it in your kitchen so you don’t forget to use it. Happy Baking y’all!
I am grateful that his post was included in the Mom Life Monday Link Up.


This all looks delicious Rebecca! Thanks for linking-up at Working Mommy Abroad, have shared your post!
I hope that works for you! Happy baking!
Thanks for the baking guide. 🙂
This year I froze my cookie dough. I have not done that before so I hope it comes out ok. If it does, I’m going to make a lot more in the future.
Yes, Bernice. “Bake it off,” means to cook already prepared dough. It can come from the refrigerator if it’s only a few days old, or it could have been frozen. The dough would need to defrost until it is pliable, but still cool enough to shape. I rarely freeze cookies or dough (except for a slice and bake), but I do make and refrigerate all my doughs one day and bake the next. It makes clean up so much easier and really streamlines the process. Bar cookies should freeze beautifully.
I love the 1,2,3 method. I hear professional bakers talking about ‘baking off’. Does this mean that they make the dough, freeze it and than bake/decorate them later? I assume the dough would need to be defrosted first.. I don’t do alot of cut outs.. I make a lot of bar cookies and other types. Not sure if I can freeze them..
Julie, it’s so fun to bake with little ones, isn’t it? I found it goes so much better when that is a separate time from the main bake and I have the chance to set up first.
Wishing you luck, Vanessa! I think this guide should help!
Thanks, Meg. it makes it a lot easier.
You’re mom sounds amazing, Amanda!! It was a revelation when I finally realized I could just omit the leavener, rather than being disappointed by blobs.
Thanks, Jen! It really makes a difference!
Just print it out and store the guide with your holiday recipes. That way you’ll have it when you need it.
Thanks, Rachel! I do love Christmas cookies! I go a little bonkers decorating them.
Wonderful Francesca! Happy baking!
Yes!! It’s so nice to wash all the mixing bowls and measuring cups once!
I think we all get a little frantic that time of year, Ashley. I hope this helps!
That’s great, Anna. I’m sure you have to extra careful. Being super organized should help. Happy baking!!
You’re welcome, Wendy! The 1,2,3 method really makes it easy because it reduces a lot of clean up.
Brandy, I hear you. It really pays to spend a bit of time getting organized at the beginning, so you can do that. Another tip would be to write down what order you bake things in, if you tend to make the same recipes every year. Store that list with your holiday recipes so next year you won’t have to think about it at all, just follow the list. Take care! Happy baking!!
These are great tips – I always find myself cooking things that need different temperatures and I know it would be easier if I bake everything that needs to be backed at 350 together (in a row) and then increase my oven to make the 425 stuff, etc – but I just get so flustered!
I don’t generally do a lot of baking for the holidays, as we do not live near extended family so don’t need as much for just our immediate family. However, these tips will be a great help for me since, not baking that frequently, I need assistance getting the timing right with things. Thanks!
Love the suggestion to freeze the dough. I’ve always got multiple cookies to make at for Christmas, and these tips will definitely help cut down on my stress levels!
What a great guide! Thank you so much for putting this together! I’m starting to think through my holiday baking plans early this year, since it’s a little more complicated with food sensitivities. Thanks for the tips for helping to keep things simple!!
This is so helpful! I always love baking around the holidays, but it can get a little crazy sometimes so this would be so nice to have!
I love the idea of doing all the mixing at once, light to dark. Such a good tip!
So smart! It’s always a last minute mad dash for me and it ends up as a disaster! I’ll definitely be using these tips!
This is a great post but can i admit something? I was a bit distracted by the AMAZING cookies!! Nice job!
This is fantastic! I’m not even thinking of Christmas yet but I’ll be remembering these tips!
I am so doing this! Love the scheduling in blocks – mix, bake, decorate. Great post!
I love baking. These tips will really help. My mom used to make at least 12 dozen cookies every Christmas (she needed these tips)!) A lot of the cutters were extremely detailed. Using a recipe that had no leavening produced a crisp cookie and all the detail was intact.
I needed this list! Thank you 🙂 I always wing it and it never goes well 😉 I’m determined to do better this year 😀
This is wonderful! I’m always so overwhelmed at the idea of baking all the cookies I want to give away. I especially love the ‘plan tasks for little helpers’ because my 4 year old granddaughter loves to help!
Oh my goodness I love holiday baking!
What great ideas to make holiday baking more manageable!
Catrina, yes, it does get hectic. Go ahead and download it, so you can have my guide next to you while baking.
That’s great, Jen. I was surprised when I first learned that about eggs too! I find besides giving little helpers specific tasks, getting it all ready before they come in to help really saves some angst. It’s hard to manage excited little people while scurrying around the kitchen looking for things. Happy Baking!!
Oh Amber, I think we’ve all been there. You might try spacing out the favorites, so it doesn’t all come at once, but everybody still gets to enjoy their treats. Happy baking!
Those little gingerbread men are so cute, the kids will love them! Giving the kids assigned tasks will help all of us!! These are all great tips, and I didn’t know about being able to leave the eggs out. I learned something new, YAY!
I go into freakout mode for days, especially thanksgiving cooking. Need some organization. My problem is I feel like I have to make everyones favorites so I end up with 5 pies, 2 cheesecakes, pb balls, cookies and any other special requests. Its insanity. Lol
Oh this is just what I needed. This is my first year that I’m going to be making a TON of Christmas cookies. I keep freaking out trying to figure out how I’m going to do it all. Thank you!