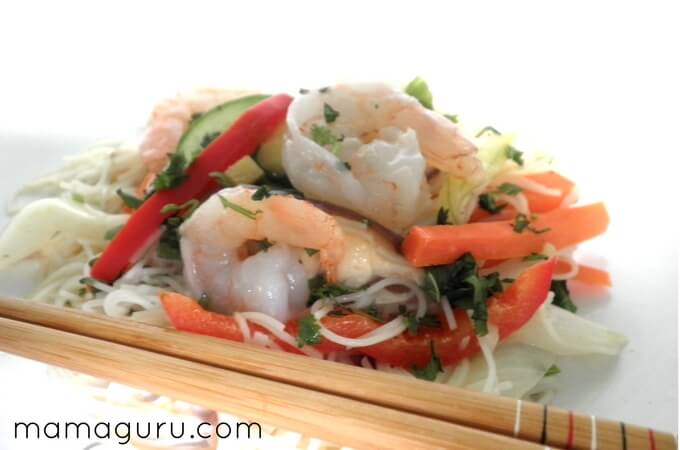
Here’s my completely inauthentic version of a Thai-style coconut stir-fry. Boy, oh, boy it’s good. The Thai chili paste added to the coconut, plus the combination of mint, basil and cilantro echo traditional Thai flavor combos. It’s a light, spicy and easy to prepare. Chow! Serves 6-8
- 2 tablespoons coconut oil
- 2 tablespoons minced ginger
- 3 cloves garlic, minced
- 1 green chili, Minced (If you want more heat, keep the seeds. Less, discard them.)
- 1 small onion
- 8 oz package shiitake mushrooms
- 1 small red pepper
- 1 small zucchini
- 2 carrots
- 1 small head of bok choy
- 1 T Thai red curry paste
- 1 can of coconut milk
- 1 pound peeled and deveined shrimp (optional, tofu would be a great vegan substitute)
- zest and juice of 1 lime
- 2 tablespoons fresh chopped basil
- 2 tablespoons fresh chopped cilantro
- 1 tablespoons fresh chopped mint
- 1 package rice noodles, prepared according to directions
- Carefully chop veggies into matchstick-sized pieces. Discard shitake stems. Check rice noodle directions. You will probably soak them in very hot water for about 8 minutes, rinse and then add them to sauce. This stir-fry will take about 8 minutes to complete if all the chopping is done in advance, so time it well.
- Heat coconut oil in a wok or large skillet over a medium-high flame. Add ginger, garlic and chili. Once fragrant (about 1 minute), add onion and stir-fry, keeping things moving. Add a small pinch of sea salt.
- Add the rest of the veggies in the following order, adding a tiny pinch of sea salt after each new veggie and waiting about 30 seconds between each addition. (This method helps draw out each vegetable's individual flavors. Don't go crazy with salt.) Red peppers, carrots, mushrooms, bok choy, zucchini.
- Add shrimp and immediately turn the heat to low. Add lime juice.
- In a small bowl whisk together the chili paste and a bit of the coconut milk until well-combined. Add this and the rest of the coconut the pan. Turn off heat. Shrimp should only be half way cooked. They will continue cooking, but not over-cooking in the residual heat.
- Add herbs, zest and rice noodles. Use large chopsticks or tongs to mix everything well. Serve immediately with lime wedges.
Baby Thai Stir-fry
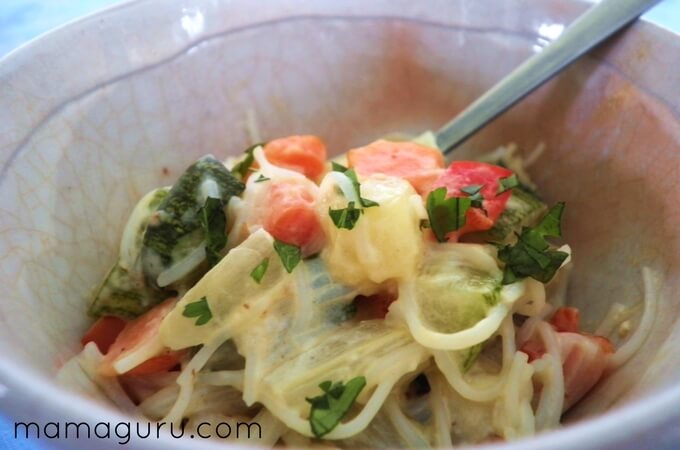
Don’t leave out the little ones. This recipe works for ages 10 months and up. Coconut milk is excellent for babies and introducing different flavors early on builds the foundation for a global pallet.
1 t coconut oil
1/4 t minced ginger
1/4 t minced garlic
1 T small dice of roasted red pepper*
1 T small dice of onion
1 T small dice of shiitake mushrooms
1 T small dice of carrots
1 T small dice of bok choy
1/4 c coconut milk
1/4 t Thai red curry paste (Red, not green, is mild enough for babies)
1 t mix of fresh chopped basil, mint and cilantro
juice of 1 wedge of lime
1/3 c prepared rice noodles, cut into small pieces
1. Steam all veggies, except the roasted red pepper for about 5 minutes in your favorite steamer. I uses a simple bamboo steamer over boiling water. Vegetables should be at a texture your baby can comfortably chew, so adjust the cooking time accordingly.
2. In a small saute pan, heat the oil over a medium flame. Add ginger and garlic and saute for about 30 seconds.
3. Add veggies and a pinch of sea salt. Stir and cook for about 2 minutes.
4. Whisk curry paste and coconut together in a small bowl. Add it to the stir-fry along with the herbs, noodles and a squirt of lime juice. Serve baby with love. Bon Appetite, mon petite!
Leftovers can be stored for up to 3 days in the refrigerator.
* To roast your own peppers, simple place a red pepper directly on a gas flame or under a broiler until skin blackens. Place the charred pepper in a paper bag for a few minutes. Rub off the black skin and do a quick rinse. For this recipe I just took about 1/4 of the pepper from the big-people version and roasted just that portion for the baby.


Leave a Reply