Well, the title of this week’s edition of Making Groceries certainly doesn’t tell the whole story.
If you buy packaged cookie dough, slicing and baking is all that’s involved. Making your own requires the additional work of measuring, mixing and wrapping. If you’re like me, however, you can cut out the baking part and just eat it raw. Honestly, dough is my favorite kind of cookie.
But sometimes I do want a good old-fashioned chocolate chip cookie. In the grocery store there are several options: the bakery, the cookie aisle and the refrigerated cookie dough section. I chose the latter because packaged chocolate cookies are just so dry. I don’t know who enjoys eating them. Also, I’ve resented the marketing on the slice and bakes over the past few years, so I felt like tackling their myth. They promote their product as the same as a homemade cookie, but with more fun and less hassle.
If you’ve ever eaten their dough, you know, it is not the same thing.
There is something to say for the idea of slice and bake cookie dough. Sometimes, it’s hard to fit in the time to bake a batch of cookies from scratch. Better yet, I love not baking an entire batch of cookies, because I have little ability to resist eating them all. I love to bake cookies in small quantities: for dessert or a special treat. The technique of slice and bake allows you to do just that.
Chocolate Chip Cookie Recipe
My recipe for chocolate chip cookies is the same one that is listed on the back of Nestle Toll House Semi-Sweet Morsels. I add an extra 1/4 c flour to prevent the dough from spreading too thin and about 1/4 t freshly grated nutmeg for flavor. (I am a nutmeg freak.)
2 1/2 c flour
1 t baking soda
1 t salt
1/4 t fresh nutmeg
2 sticks of butter, softened
3/4 c sugar
3/4 c brown sugar
1 t vanilla
2 eggs, best if room temperature
12 oz bag of semi-sweet chocolate chips
1. Mix all the dry ingredients together.
2. Beat butter, sugars and vanilla together until soft and fluffy. Add eggs, one at a time and mix until just combined. Gradually mix in dry ingredients.
3. Stir in chocolate chips. Proceed to Slice and Bake Directions, below.
A Brief History of Chocolate Chip Cookies
The Nestle recipe is actually the original chocolate chip cookie recipe written by Ruth Wakefield in the 1930s. She was attempting to make chocolate cookies, so she chopped up a chocolate bar and added it to her dough, fully expecting it to melt and create an entirely chocolate cookie. Her happy accident was the invention of the chocolate chip! She served these cookies at her Massechuttes lodge called The Toll House Inn. Her recipe spread around New England and sales of Nestle bars sky-rocketed. She and Nestle later reached an agreement for them to print her recipe (first on bars, then on their more convenient chocolate chips) in exchange for a lifetime supply of chocolate and (one hopes, a monetary amount).
I love this story and so I always buy Toll House chocolate chips. I like the idea of celebrating a woman’s contribution to American cuisine. Chocolate chip cookies may not be the fanciest food, but they satisfy my every taste bud. They are sweet and humble and when you bake them, their scent transforms any house into a home.
The Toll House recipe is largely unchanged, with one exception. Ruth Wakefield’s recipe called for it to be refrigerated overnight. By using the slice and bake technique, you get that. This extra step delays gratification, but also improves the texture of the cookie, making it fatter. That, along with the extra flour I mentioned earlier, produce a superior chocolate chip cookie. The flour adjustment corrects the difference between our flour and the flour Wakefield used. As is often said, baking is a science, so small tweaks or changes in ingredients make a noticeable difference.
Slice and Bake Technique
1. After making the cookie dough, get two large piece of plastic wrap. Place half of the dough on each piece of plastic wrap in a long line. Carefully wrap the plastic around the sides of the dough, trying to eliminate any air pockets. Twist the ends of the wrap and tuck them under the body of the cookie log.
2. Refrigerate for 2-4 hours. At this point, your logs won’t be perfectly round. If you want that look, take them out and roll the logs on your counter. Because it has been chilled, the dough is firm and will now retain its shape. Place one log back in the refrigerator and the other in the freezer. Chill the refrigerated log overnight for best results.
3. Simply slice off the dough in 1/2 inch circles and place on a cookie sheet. Bake as normal at 375° for 9-12 minutes, until you smell them and the edges are golden brown. Only bake the number of cookies you want. You can keep the rest of it in the refrigerator of about a week. Bake just one or two at a time for portion control. If you like baking small batches, use a toaster oven to reduce your energy consumption.
4. Use the freezer dough within three months. It is not necessary to put it in the refrigerator first. Just use a sharp knife when you cut through the log.
The Bottom Line
I thought I would fall flat on my face as far as price was concerned this week. Chocolate chips and refrigerated cookie dough are just about the same price. Add in the cost of butter, eggs, flour and sugar and I expected the price to double for the home-made version. But once I mixed up a batch of cookie dough, I realized there was enough for two logs. You get double the quantity of dough when you make your own, which definitely helps with value. It cost me roughly $4 for two cookie logs, so I saved about a dollar.
I knew I’d win on flavor and I’ll take that pat on the back for bothering to bake my own cookies. The packaged dough may look the same, may smell the same, but it sure doesn’t taste the same. It also contains a paragraph of extra ingredients from Wakefield’s recipe that nobody should be eating.
It takes about 15 minutes of extra work to make these cookies from scratch and roll them into logs. Taste and the ability to control portions are the best reasons to make your own.
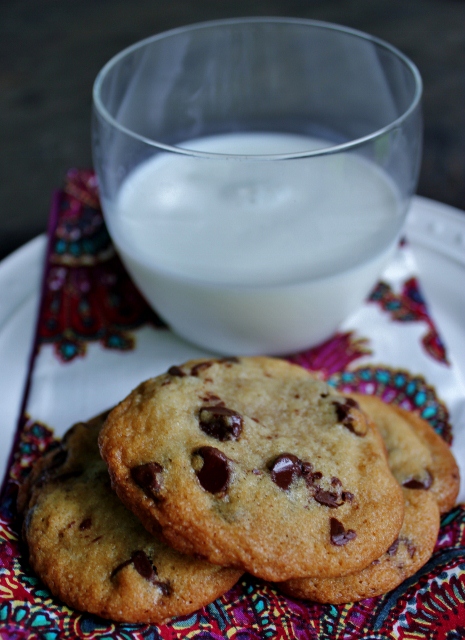
One of my favorite Food Rules from Michael Pollan is: Eat whatever junk food you want, as long as you make it yourself. Cookies made from scratch, warm from the oven and paired with an ice-cold cup of milk have a place in our diets. Cookies that come from a factory in a box or dough that’s loaded with metallic tasting preservatives do not. Sweets should remain treats. Make the very best ones and savor them. Leave the garbage on the shelves for the garbage eaters. Good cookies are made by Mom.
 (or Dad or you…I’m not discriminating, but I do go by the name mamaguru, so you can imagine my primary audience.)


Leave a Reply