Say what? How is freezing fruit making groceries?
This week’s edition of Making Groceries is all about a technique, not a recipe. Right now gardens, farmer’s markets and good ol’ supermarkets are teaming with the best fruit at the height of season. Depending on your region, there is something delicious being harvested right now or in the coming weeks.
If you have a large quantity of fruit, you should absolutely take advantage and preserve it. Of course you can make yummy jams, but sometimes you want to save the freshness of fruit for smoothies or pie or simply, winter. Here’s how to do it right.
This is the only thing I’ve ever learned from watching Top Chef. Everything else those chef’s do is way over my head, but they introduced me to the technique of flash freezing.
The basic idea of flash freezing is to freeze individual pieces of fruit (or blanched veggies) before you package them together. If you simply dump some berries in a freezer bag, they’ll freeze together in a massive lump that will be difficult to defrost later, particularly if you want to use only a portion at a time.
How to Flash Freeze Fruit
1. Wash and dry your fruit. To dry: spread fruit out in a single layer on top of clean kitchen towels. (Side note: depending on the color and juiciness of your fruit, you may want to use stainable towels. You can buy a dozen for about $10 at a restaurant supply store. They’re a great paper towel replacement for earth lovers.)
2. Peel, pit, hull and/or slice your fruit into the appropriate sizes. Berries should be left whole, but mangoes need to be cut into small chunks. Peaches should be sliced (I would peel them too). Use your judgement and try to be as consistent as possible with each fruit.
3. Line a baking sheet with foil and spread out your fruit pieces so they don’t touch each other. You can gently lay another piece of foil over top of the fruit as well. Gently place it in the freezer and let it freeze overnight or up to a day. This allows each piece to freeze individually.
I know what some of you are saying: I don’t have that kind of freezer space.
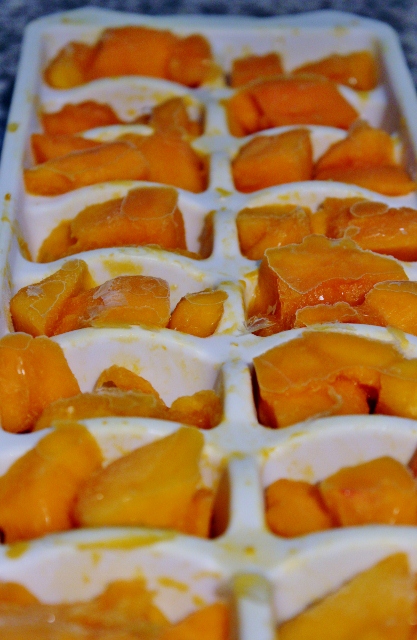
Aha! Here’s an alternative. You can put small bits of fruit into ice cube trays. Sure, a few will stick together if you plan on say, freezing more than 12 blueberries at a time, but they still are quite manageable and will work well.
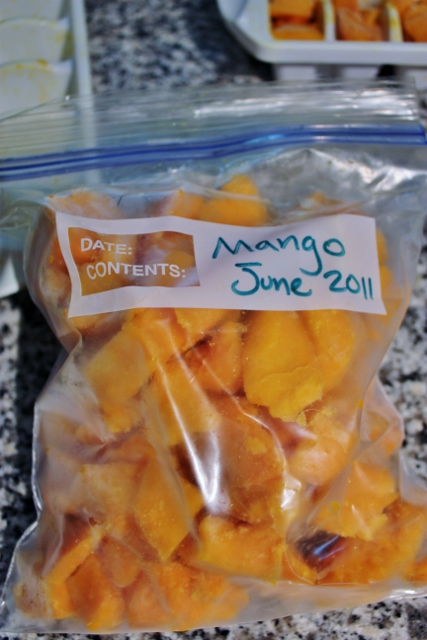
4. Carefully remove the fruit from your baking sheets and ice-cube trays after you have prepared your bags. Think about the quantities you will most likely want to use your fruit and use a corresponding freezer bag. If you think you”ll be making a peach cobbler, check your recipe and pre-measure the fruit for a larger bag. If you think you’ll mostly use fruit for smoothies, choose smaller bags. That way you will open it less often, cutting the chances of improper sealing.
5. Label bags before adding fruit, including the date and quantity (if your measured for a recipe). Add the fruit. Close the bag almost shut, squeezing out as much air as you can. Bring your lips to the zip line and suck out as much excess air as possible. Then zip it shut and place your fruit in the freezer. If you did a good job, it’ll keep for a year. An added bonus is that a full freezer actually consumes less energy than an empty one.
The Bottom Line
There is no cost analysis this week. I have half a freezer full of mangoes; they were free for me because we have a tree and generous neighbors who shared with us. Depending on your access to fruit, this can be very expensive or a great way to not lose the bounty of your harvest, which is always both excessive and short.
If you happen to have a garden, a berry bush or a fruit tree, why not make the effort? It’s free organic produce after all. If you don’t have your own supply, I encourage you to visit a local farm and participate in picking your own food. It’s inexpensive and makes for a fun family outing. You literally get to take the fruits of your labor home with you. They’ll be the best thing you eat all year, so why not savor their sweetness now and save some to enjoy later by way of flash freezing too.


Leave a Reply